Hello everyone, welcome to the blog post. In this short tutorial, we are going to take an in-depth look at how to consume and produce JSON responses using a widely appreciated Java framework i.e. Spring Boot. As we all know Spring Boot is a framework designed to build a secure web application, microservice, REST API, and production-ready spring application. Modern-day application deals in a large amount of data, which they share in JSON format. A JSON is a standard plain text-based representation of structured data. It is one of the popular formats for data transmission over the internet. Due to its user-friendly syntax and lightweight, it helps in the process faster.
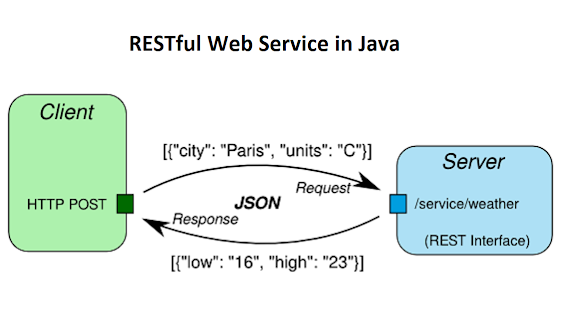
As we have discussed above, JSON is widely processed over the network for sharing data between two nodes (ends). Hence Web services and REST API prefer data communication either in JSON or XML-based format.
Let's see how can we let Spring Boot consumes JSON data as Input.
Let's understand with the help of a simple Restful web service that consumes the stadium’s detail in JSON as part of the HTTP-request body. Below is a complete java program that consumes the JSON data.
Application.java
package com.javarevisited.gettingstarted;


import org.springframework.boot.SpringApplication;

import org.springframework.boot.autoconfigure.SpringBootApplication;


import java.io.IOException;


@SpringBootApplication

public class GettingStarted {

    public static void main(String[] args) throws IOException {

        SpringApplication.run(GettingStarted.class, args);

    }

}
Stadium.java
package com.javarevisited.gettingstarted.model;


import jakarta.persistence.Entity;

import jakarta.persistence.GeneratedValue;

import jakarta.persistence.GenerationType;

import jakarta.persistence.Id;

import jakarta.validation.constraints.Max;

import jakarta.validation.constraints.Min;

import jakarta.validation.constraints.NotNull;

import java.sql.Date;


public class Stadium {


@Id

    @GeneratedValue(strategy = GenerationType.AUTO)

    private int stadium_id;


    @NotNull(message = "Stadium name is required")

    private String name;


    @Min(message = "Stadium should meet the min capacity", value = 50)

    @Max(value = 100000, message = "Stadium should meet the max capacity")

    private String capacity;


@NotNull(message = "Stadium must belongs to a country")

    private String country;


private String constructedInYear;

    private Date lastRennovation;


    public int getStadium_id() {

        return stadium_id;

    }

    public void setStadium_id(int stadium_id) {

        this.stadium_id = stadium_id;

    }


public String getName() {

        return name;

    }


    public void setName(String name) {

        this.name = name;

    }


    public String getCapacity() {

        return capacity;

    }


    public void setCapacity(String capacity) {

        this.capacity = capacity;

    }


    public String getCountry() {

        return country;

    }


    public void setCountry(String country) {

        this.country = country;

    }


    public String getConstructedInYear() {

        return constructedInYear;

    }


    public void setConstructedInYear(String constructedInYear) {

        this.constructedInYear = constructedInYear;

    }


    public Date getLastRennovation() {

        return lastRennovation;

    }


    public void setLastRennovation(Date lastRennovation) {

        this.lastRennovation = lastRennovation;

    }


    @Override

    public String toString() {

        return this.name + " stadium has a total capacity of "
  + this.capacity + " seats and was  constructed in year "
+ this.constructedInYear + " and was last renovated on date                                       " + this.lastRennovation;

    }

}
The above code represents a stadium entity object.
StadiumRepo.java
package com.javarevisited.gettingstarted.repo;


import com.javarevisited.gettingstarted.model.Stadium;

import org.springframework.data.jpa.repository.JpaRepository;


import java.util.List;


public interface StadiumRepo extends JpaRepository<Stadium, Integer> {


}
StadiumController.java
package com.javarevisited.gettingstarted.controller;


import com.javarevisited.gettingstarted.model.Stadium;

import com.javarevisited.gettingstarted.repo.StadiumRepo;

import jakarta.persistence.EntityNotFoundException;

import jakarta.validation.Valid;

import org.springframework.beans.factory.annotation.Autowired;

import org.springframework.http.HttpStatus;

import org.springframework.http.MediaType;

import org.springframework.http.ResponseEntity;

import org.springframework.web.ErrorResponse;

import org.springframework.web.bind.MethodArgumentNotValidException;

import org.springframework.web.bind.annotation.*;

import java.util.HashMap;

import java.util.List;

import java.util.Map;

import java.util.Optional;


@RestController

@RequestMapping("/api/v1/stadiums")

public class StadiumController {


@Autowired

StadiumRepo stadiumRepo;


@RequestMapping(value = "/", method = RequestMethod.GET)

public ResponseEntity<List<Stadium>> getAllStadiums(){

    return new ResponseEntity<>(stadiumRepo.findAll(), HttpStatus.OK);

}


    @PostMapping(

    value = "/",

    consumes = {MediaType.APPLICATION_JSON_VALUE, MediaType.APPLICATION_XML_VALUE},

    produces = {MediaType.APPLICATION_JSON_VALUE, MediaType.APPLICATION_XML_VALUE})

    public ResponseEntity<Stadium> postNewStadium(@Valid @RequestBody Stadium stadium){

        return new ResponseEntity<Stadium>(stadiumRepo.save(stadium), HttpStatus.OK);

    }

}
As you can see from the above rest controller, we have a POST request to /api/v1/stadiums/ that takes stadium details in JSON format as part of Request body
Consuming JSON data
The above mention endpoint will consume APPLICATION_JSON_VALUE as the media type. Spring Boot supports various media types. Using it one can tweak their application input behavior. In order to reach the Spring Boot REST API directly, we have to provide a JSON-encoded object that has all the required arguments that match the Stadium entity.consumes = {MediaType.APPLICATION_JSON_VALUE}
@RequestBody Stadium stadiumBelow is the sample data we will send to our REST API.
{


"stadium_id": 5,


"name": "Pallekele International Cricket Stadium",


"capacity": "35000",


"country": "SriLanka",


"constructedInYear": "2005",


"lastRennovation": "2022-08-28"


}
Consuming JSON data is simple and straightforward using Spring Boot. Now let’s see how to return JSON response using Spring Boot.
Producing JSON data
It is to note here that, Spring Boot by default has Jackson dependency as part of spring-boot-starter-json. @RestController annotation on top of any Spring Boot class by default render JSON response as long as Jackson is residing in the classpath.
@RequestMapping(
value = "/",
method = RequestMethod.GET,
produces = {MediaType.APPLICATION_JSON_VALUE, MediaType.APPLICATION_XML_VALUE}
)
public ResponseEntity<List<Stadium>> getAllStadiums(){
        return new ResponseEntity<>(stadiumRepo.findAll(), HttpStatus.OK);
}
In our case, a response will be serialized by the Jackson2 library first and then serves as a JSON object to the client.
Below is the response after making a GET request to
GET: http:{host_name}:{port_name}/api/v1/stadiums/
[

  {

    "stadium_id": 3,

    "name": "Lords Cricket Stadium",

    "capacity": "40000",

    "country": "England",

    "constructedInYear": "1890",

    "lastRennovation": "2013-02-17"

  },

  {

    "stadium_id": 5,

    "name": "Pallekele International Cricket Stadium",

    "capacity": "35000",

    "country": "SriLanka",

    "constructedInYear": "2005",

    "lastRennovation": "2022-08-28"

  }

]
Are you concerned about, how this conversion took place? without explicitly parsing the stadium’s POJO class into JSON. The answer to your question is there is no need to perform an explicit json conversion because you have annotated with @RestController. Just return a POJO, and the Jackson serializer will handle the JSON conversion by itself.
When used in conjunction with @Controller, it is the same as using ResponseBody.
We use @RestController in place of the standard @Controller, and @ResponseBody is automatically applied to all resources in that controller rather than having to place it on each controller function.
Modifying Jackson ObjectMapper
To handle request and response body conversion, Spring boot automatically configures mapping Jackson2HttpMessageConverter as one of the default converters. Using property files or unique bean definitions, we may alter the default conversion behavior.
Property Customization
spring.jackson.date-format= specify date format here, `yyyy-MM-dd HH:mm:ss`.


spring.jackson.default-property-inclusion= specify inclusion of properties here.


spring.jackson.deserialization.*= on/off features for deserialization.


spring.jackson.locale= Locale used for formatting.


spring.jackson.mapper.*= Jackson general purpose on/off features.


spring.jackson.parser.*= Jackson on/off features for parsers.


spring.jackson.property-naming-strategy= # PropertyNamingStrategy.


spring.jackson.time-zone= Specify time zone here.


spring.jackson.visibility.*= Put limit on methods (and fields) for auto-detected.
Customization using Bean
@Configuration
public class WebConfig
{
    @Bean
    public Jackson2ObjectMapperBuilder customJson() {
        return new Jackson2ObjectMapperBuilder()
            .indentOutput(true)
            .serializationInclusion(JsonInclude.Include.NON_NULL)
            .propertyNamingStrategy(PropertyNamingStrategy.SNAKE_CASE);
    }
}
Conclusion
That's all about how to accept and produ e JSON response in Spring Boot application. With this, we reach the end of our short article. Here we have learned, how Spring Boot consumes and produces JSON data and the underlying mechanism behind this conversion. In addition to it, the article put some light on how to customize the default behavior of Jackson2ObjectMapper.
Other Spring MVC articles and Tutorials you may like- 20+ Spring Boot Interview Questions with Answers
- How to configure CORS in Spring Security
- How to upload a file and json on Postman?
- How to log SQL in a Spring Boot application?
- How to use RequestBody and ResponseBody on Spring MVC?
- Spring Boot + Angular Example for Fullstack Developers
- How to fix No Spring Bean found of Type using @Autowired
- 6 Best Courses to learn Spring Framework
- 15 Spring Data JPA Interview Questions with Answers
- What is Circuit Breaker Pattern in Microservices
- How to use MyBatis with Spring Boot in Java?
- 18 Spring Cloud Features Java developer should learn
- What is ModelAttribute in Spring MVC?
- Difference between @RequestParam and @PathVariable in Spring
- What is BFF Pattern in Microservices?
- Spring Boot + React.js example for Java developers
- 5 Best Courses to learn Reactive Spring and WebFlux
- How to use @SpringBootTest annotation in Java
- 25+ Spring Security Interview Questions with Answers
- My Favorite Spring Boot Courses for Java programmers
- How to enable Spring security in a Java web application?
Thanks a lot for reading this article so far. If you like this Java and Spring Boot tutorial then please share them with your friends and colleagues. If you have any questions or feedback then please drop a note.
cool
ReplyDelete