1. Introduction
Working with lists is common in React web development. Creating a static list is very easy but making it dynamic can be tough. Dynamic lists can generally be manipulated in one way or another. For example, a new item can be added to a list by entering a value in an input field or an item can be removed when it is clicked.
In this tutorial, we will learn how to create a dynamic list in which a new item can be added through an input field. Moreover, we will learn how to delete an item when clicked.
2. Creating a dynamic list in React.js
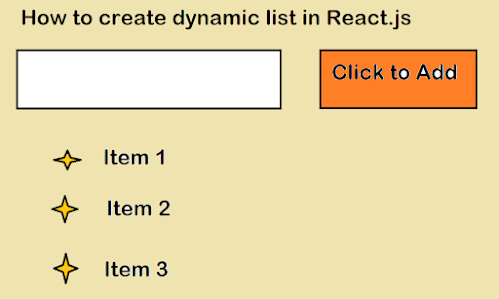
So let’s start by creating a static list first, something like the below list
import "./styles.css";
function App() {
return (
<div className="App">
<input type="text" /> <button> Click to Add </button>
<ul>
<li>Item1</li>
<li>Item2</li>
<li>Item3</li>
</ul>
</div>
);
}
export default App;
As of now, the component has an input field, a button, and a static list below them.

So, in our dynamic list, there will be no items present initially. When a user enters something in the input field and clicks the button, the item is added to the list.
First, we need a state that will store the items present in the list.
const [list, setList] = useState([]);
Initially, it will be an empty array. We need another state that will hold the value that is being entered in the input field.
const [item, setItem] = useState("");
Now, we will use this state in the input field.
import { useState } from "react";
import "./styles.css";
function App() {
const [list, setList] = useState([]);
const [value, setValue] = useState("");
return (
<div className="App">
<input
type="text"
value={value}
onChange={(e) => setValue(e.target.value)}
/>{" "}
<button> Click to Add </button>
<ul>
</ul>
</div>
);
}
export default App;
In the input element, the state “value” is assigned to the value attribute while the onChange event handler handles change in the value. Next, we need to create an onClick event handler on the button which will add the value to the list.
const addToList = () => {
let tempArr = list;
tempArr.push(value);
setList(tempArr);
setValue("")};
In the “addToList” function, the value entered in the input field is pushed to the list. Remember, in the end, the state that holds the value should be reinitialized to an empty string so that the input field becomes empty.
Let’s assign the function as the onClick event handler for the button.
import { useState } from "react";
import "./styles.css";
function App() {
const [list, setList] = useState([]);
const [value, setValue] = useState("");
const addToList = () => {
let tempArr = list;
tempArr.push(value);
setList(tempArr);
setValue("");
};
return (
<div className="App">
<input
type="text"
value={value}
onChange={(e) => setValue(e.target.value)}
/>{" "}
<button onClick={addToList}> Click to Add </button>
<ul></ul>
</div>
);
}
export default App;
Now, the list is being created dynamically but it is appearing on the UI. So, let’s add a map function that will iterate through the “list”.
{
list.length > 0 && list.map((item) => <li>{item} </li>);
}
Now, the code will be working as expected.
import { useState } from "react";
import "./styles.css";
function App() {
const [list, setList] = useState([]);
const [value, setValue] = useState("");
const addToList = () => {
let tempArr = list;
tempArr.push(value);
setList(tempArr);
setValue("");
};
return (
<div className="App">
<input
type="text"
value={value}
onChange={(e) => setValue(e.target.value)}
/>{" "}
<button onClick={addToList}> Click to Add </button>
<ul>{list.length > 0 && list.map((item) => <li>{item} </li>)}</ul>
</div>
);
}
export default App;
3. Deleting items from the list
To create a mechanism for deleting an item on a mouse click, we need to create an onClick functionality on every item.
<ul>
{list.length > 0 &&
list.map((item, i) => <li onClick={() => deleteItem(i)}>{item} </li>)}
</ul>;
Here’s one important thing to notice. Along with each item, we are also having its index, and this index is passed to the “deleteItem” function. We will use the index to remove the item from the list.
const deleteItem = (index) => {
let temp = list.filter((item, i) => i !== index);
setList(temp);
};
In this function, the existing list is being filtered using the index. This is how the entire code looks.
import { useState } from "react";
import "./styles.css";
function App() {
const [list, setList] = useState([]);
const [value, setValue] = useState("");
const addToList = () => {
let tempArr = list;
tempArr.push(value);
setList(tempArr);
setValue("");
};
const deleteItem = (index) => {
let temp = list.filter((item, i) => i !== index);
setList(temp);
};
return (
<div className="App">
<input
type="text"
value={value}
onChange={(e) => setValue(e.target.value)}
/>{" "}
<button onClick={addToList}> Click to Add </button>
<ul>
{list.length > 0 &&
list.map((item, i) => <li onClick={() => deleteItem(i)}>{item} </li>)}
</ul>
</div>
);
}
export default App;
Let’s check the output.

Yes, it works as expected.
4. Wrapping it up
Creating a dynamic list in React depends on how you use the state and array methods such as map and filter. You can do it without array methods but it will be tough. So, it is better to use the array methods efficiently with the React state.
Other React Tutorials and May like to explore
- Top 5 Websites to learn React.js for Beginners
- My favorite books to learn React.js for beginners
- The React Developer RoadMap
- My favorite free Courses to learn Angular and React
- 5 Best courses to learn React Native for beginners
- The Frontend and Backend Developer RoadMap
- 5 Online training courses to learn Angular for Free
- 5 Courses to learn Object-Oriented Programming for Free
- 10 Courses to learn AWS for beginners
- 10 Books and Courses to learn Angular
- What is Redux and how to use it?
- How to use lifecycle method sin REact
- What is Redux Thunk with an example for beginners
Thanks for reading this article so far. If you like this React Tutorial to create a dynamic list then, then please share them with your friends and colleagues. If you have any questions or feedback, then please drop a comment.
No comments:
Post a Comment
Feel free to comment, ask questions if you have any doubt.